TR
TR EN
EN

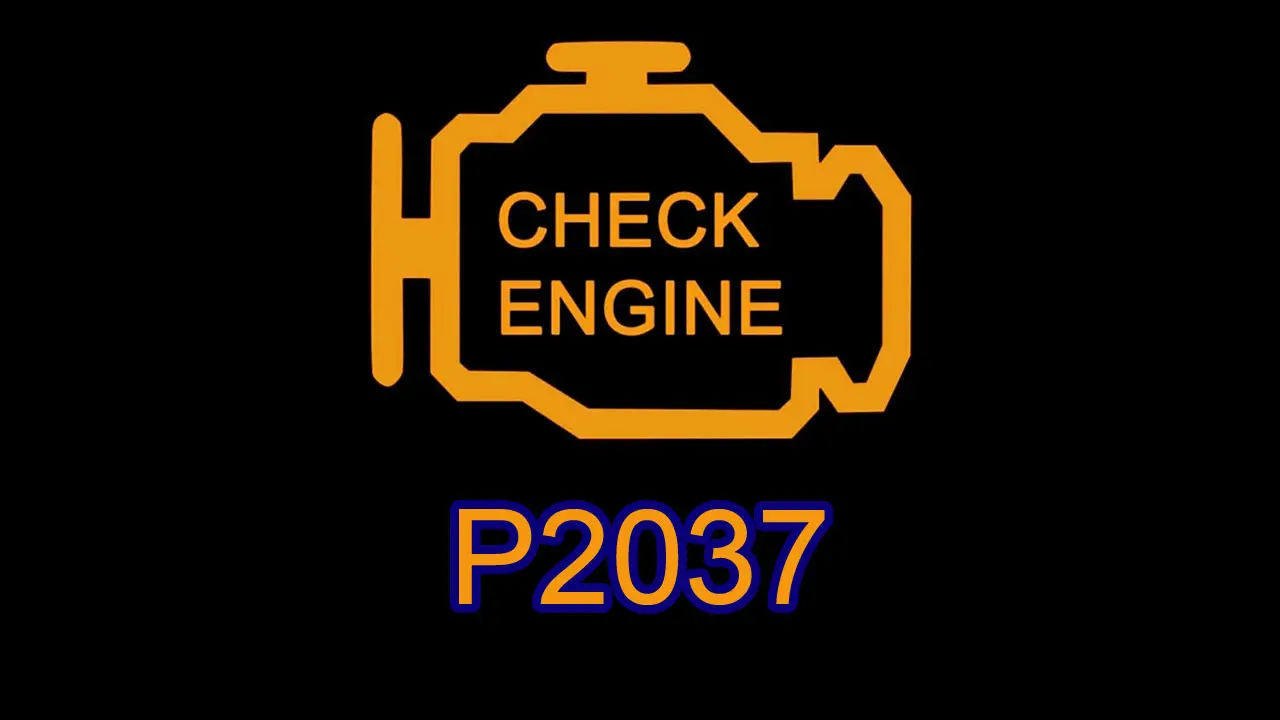
P2037 Reductant Injection Air Pressure Sensor "A" Circuit Malfunction
P2037 Reductant Injection Air Pressure Sensor "A" Circuit Malfunction is a generic OBD-II diagnostic trouble code indicating that the vehicle's control module has detected a malfunction in the electrical circuit of the reductant injection air pressure sensor "A".
This code is associated with the Selective Catalytic Reduction (SCR) system used on many modern diesel vehicles. In SCR systems that use compressed air to assist with reductant injection, the air pressure sensor monitors pressure within the injection system and sends an electrical signal to the engine control module or aftertreatment control module.
In simple terms, the control module has detected a problem with the pressure sensor's electrical circuit, but the fault is not specifically identified as low, high, or intermittent.
Possible causes include:
-
Faulty reductant injection air pressure sensor
-
Open circuit
-
Short circuit
-
Damaged wiring
-
Poor electrical connection
-
Corroded connector
-
Missing reference voltage
-
Sensor ground problem
-
Damaged sensor signal circuit
-
Power-supply problem
-
Aftertreatment control-module fault
-
Software or calibration problems
P2037 is therefore a circuit malfunction code, and the diagnosis should begin with the sensor's power, reference voltage, ground, signal circuit, wiring, and connector.
What Does P2037 Mean?
The code description contains several important terms.
Reductant
"Reductant" refers to the fluid used by an SCR system to reduce nitrogen oxide emissions.
Depending on the vehicle and market, it may be called:
-
Diesel Exhaust Fluid (DEF)
-
AdBlue
-
AUS 32
-
Urea solution
The reductant is injected into the exhaust system, where it participates in the SCR process to help convert NOx into primarily nitrogen and water.
Injection Air Pressure
Some SCR systems use compressed air to assist reductant injection.
The injection air can help with:
-
Reductant atomization
-
Spray quality
-
Dosing consistency
-
Reductant delivery
-
Injector operation
The control system therefore needs a reliable pressure signal.
Pressure Sensor "A"
The letter "A" identifies a particular pressure sensor or pressure-sensor circuit within the vehicle's SCR system.
It does not necessarily mean that every manufacturer physically labels the sensor "A."
The exact sensor location and system design vary between vehicles.
Circuit Malfunction
The term "Circuit Malfunction" means the control module has detected an electrical problem with the sensor circuit.
Unlike:
-
P2038 – Range/Performance
-
P2039 – Circuit Low
-
P2040 – Circuit High
-
P2041 – Circuit Intermittent
P2037 is a broader circuit fault.
The control module may detect a problem involving:
-
Sensor power
-
Reference voltage
-
Ground
-
Signal wire
-
Wiring continuity
-
Short circuits
-
Connector integrity
The exact monitoring strategy depends on the vehicle manufacturer.
How Does the Reductant Injection Air Pressure Sensor Work?
Many automotive pressure sensors use a three-wire circuit consisting of:
-
Reference voltage
-
Ground
-
Signal
The sensor converts pressure into an electrical signal that the control module can interpret.
As injection-air pressure changes, the sensor's output should change accordingly.
The control module uses this information to determine whether the injection-air system is operating correctly.
A simplified circuit can be represented as:
Control module → reference voltage → pressure sensor
Control module ← sensor signal ← pressure sensor
Control module ↔ sensor ground
If one part of this circuit is open, shorted, corroded, or otherwise defective, the control module may store P2037.
The exact wiring configuration may differ between manufacturers.
Why Is the Pressure Sensor Important?
The pressure sensor allows the SCR control system to monitor the air pressure used during reductant injection.
Accurate pressure information can be important for:
-
Reductant atomization
-
Dosing accuracy
-
Injector control
-
SCR system monitoring
-
NOx reduction
-
Emissions compliance
If the pressure signal becomes unavailable or unreliable, the control module may no longer be able to verify proper reductant injection conditions.
Symptoms of P2037
Symptoms vary depending on the vehicle and the severity of the circuit fault.
Check Engine Light
The Check Engine Light is one of the most common symptoms.
DEF/AdBlue Warning
The vehicle may display messages such as:
-
Check DEF
-
Check AdBlue
-
DEF system fault
-
AdBlue system fault
-
SCR system fault
-
Exhaust fluid system fault
-
Emissions system fault
The exact warning depends on the manufacturer.
Missing or Implausible Pressure Reading
A scan tool may display:
-
Zero pressure
-
An unavailable PID
-
A fixed pressure value
-
An implausible pressure value
-
A pressure value that does not change
This can occur when the pressure sensor circuit is not functioning correctly.
Reductant Dosing Problems
A circuit failure can prevent the control system from reliably monitoring injection-air pressure.
Possible symptoms include:
-
Reduced reductant dosing
-
Dosing interruption
-
Incorrect atomization
-
SCR dosing faults
Increased NOx Emissions
If reductant injection is affected, NOx conversion efficiency may decrease.
Reduced SCR Efficiency
The vehicle may detect that the SCR system is not achieving the expected emissions-reduction performance.
Reduced Engine Power
Some diesel vehicles may eventually activate an emissions-related reduced-power strategy.
DEF/AdBlue Countdown
A persistent SCR fault may result in:
-
DEF/AdBlue countdown
-
Speed limitation
-
Reduced-power warning
-
Restart restriction
The exact strategy is manufacturer-specific.
No Noticeable Driving Symptoms
The vehicle may drive normally when P2037 first appears.
This is possible because the fault concerns the emissions aftertreatment system rather than the basic operation of the engine.
Common Causes of P2037
Faulty Reductant Injection Air Pressure Sensor
The sensor itself may have an internal electrical failure.
Possible failures include:
-
Internal open circuit
-
Internal short circuit
-
Incorrect signal output
-
Failed sensing element
-
Internal electronic failure
Open Sensor Circuit
A broken wire can interrupt communication between the pressure sensor and the control module.
Possible causes include:
-
Broken conductor
-
Pulled wire
-
Chafed harness
-
Failed splice
-
Loose terminal
Short Circuit
A sensor circuit may be shorted to:
-
Ground
-
Battery voltage
-
Another circuit
The exact fault may determine whether the vehicle sets P2037, P2039, P2040, or another manufacturer-specific code.
Damaged Wiring
The SCR system is often located close to hot exhaust components and underneath the vehicle.
Wiring may be damaged by:
-
Exhaust heat
-
Vibration
-
Abrasion
-
Road debris
-
Water
-
Road salt
-
Incorrect routing
Corroded Connector
Connector corrosion can increase resistance or interrupt the circuit.
Look for:
-
Green corrosion
-
White deposits
-
Moisture
-
Loose pins
-
Bent terminals
-
Damaged seals
Poor Terminal Contact
A connector can look physically normal while still having insufficient terminal tension.
This can cause:
-
High resistance
-
Signal loss
-
Intermittent operation
-
Incorrect sensor readings
Missing Reference Voltage
Many pressure sensors require a stable reference voltage.
If the reference supply is missing, the sensor cannot generate a valid output.
Possible causes include:
-
Broken reference wire
-
Control-module fault
-
Shorted sensor circuit
-
Power-supply problem
Sensor Ground Problem
A poor ground can prevent the pressure sensor from operating correctly.
Possible causes include:
-
Corroded ground connection
-
Broken ground wire
-
High resistance
-
Poor terminal contact
Damaged Signal Circuit
The signal wire between the sensor and control module may be:
-
Open
-
Shorted
-
Chafed
-
Corroded
-
Damaged by heat
Fuse or Power Supply Problem
Depending on the vehicle design, a fuse or shared power supply may feed the pressure sensor or associated SCR components.
A blown fuse should not simply be replaced without determining why it failed.
Water Intrusion
Water inside the connector can cause:
-
Corrosion
-
Short circuits
-
Signal distortion
-
Electrical resistance
-
Intermittent faults
DEF/AdBlue Contamination
DEF/AdBlue contamination around connectors can contribute to electrical problems if it reaches wiring or terminals.
Faulty Aftertreatment Control Module
In rare cases, the control module responsible for monitoring the pressure sensor may have an internal circuit fault.
This should generally be considered only after the external circuit and sensor have been tested.
Software or Calibration Problem
Incorrect control-module software or calibration may occasionally cause sensor-circuit monitoring problems.
Vehicles Commonly Affected by P2037
P2037 can occur on diesel vehicles equipped with SCR systems that use reductant injection-air pressure monitoring.
Examples may include:
-
Ford Super Duty Diesel
-
Ford Transit Diesel
-
Chevrolet Silverado Duramax
-
GMC Sierra Duramax
-
Ram Heavy Duty Diesel
-
Mercedes-Benz Sprinter Diesel
-
Volkswagen Touareg TDI
-
Volkswagen Transporter
-
Audi Q7 TDI
-
BMW X5 Diesel
-
Peugeot Boxer Diesel
-
Citroën Jumper
-
Fiat Ducato Diesel
-
Iveco Daily
-
Renault Master
-
Opel Movano
This list is not exhaustive.
The exact SCR architecture, pressure-sensor location, air-assist system, and control strategy vary by manufacturer and engine.
How Is P2037 Diagnosed?
P2037 is primarily an electrical circuit diagnosis.
The technician should determine whether the problem is:
-
Sensor failure
-
Open circuit
-
Short circuit
-
Missing reference voltage
-
Ground problem
-
Signal-circuit problem
-
Connector problem
-
Control-module problem
Step 1: Scan for Additional Trouble Codes
Use a suitable diagnostic scan tool to retrieve:
-
Stored codes
-
Pending codes
-
Manufacturer-specific codes
-
Freeze-frame data
Pay particular attention to codes involving:
-
Reductant air pressure
-
Reductant air pump
-
Pressure-control valve
-
Reductant injector
-
DEF/AdBlue dosing
-
NOx sensors
-
SCR efficiency
-
Aftertreatment communication
Additional codes may identify the primary fault.
Step 2: Check Freeze-Frame Data
Review the conditions under which P2037 was stored.
Check:
-
Engine RPM
-
Vehicle speed
-
Engine coolant temperature
-
Ambient temperature
-
Battery voltage
-
Reductant temperature
-
Injection-air pressure
-
Air-pump command
-
Reductant dosing command
This can help identify whether the fault is temperature-dependent or occurs during active dosing.
Step 3: Inspect the Pressure Sensor
Inspect the pressure sensor for:
-
Physical damage
-
Corrosion
-
Contamination
-
Loose mounting
-
Damaged connector
-
DEF/AdBlue deposits
Step 4: Inspect the Connector
Check the sensor connector for:
-
Corrosion
-
Moisture
-
Loose terminals
-
Bent pins
-
Damaged seals
-
Poor terminal tension
-
Broken locking components
Step 5: Inspect the Wiring Harness
Follow the harness from the sensor toward the control module.
Look for:
-
Broken wires
-
Chafing
-
Melted insulation
-
Pinched wires
-
Exposed conductors
-
Previous repairs
-
Loose harness clips
Pay particular attention to sections near the exhaust system.
Step 6: Check Sensor Power or Reference Voltage
Using the vehicle-specific wiring diagram, identify the sensor power/reference circuit.
Measure the voltage at the sensor connector.
If the required voltage is missing, determine whether the problem is caused by:
-
Open wiring
-
Short circuit
-
Fuse
-
Power supply
-
Control-module fault
Do not assume a failed sensor when the sensor is simply not receiving the required voltage.
Step 7: Check Sensor Ground
Verify the ground circuit.
A voltage-drop test is often more useful than a simple continuity test because a wire can show continuity while still having excessive resistance under load.
Step 8: Check the Signal Circuit
Measure the pressure sensor signal according to the manufacturer's diagnostic procedure.
The signal should correspond to the sensor's operating condition.
An absent, fixed, or abnormal signal may indicate:
-
Sensor failure
-
Open signal wire
-
Short circuit
-
Reference-voltage problem
-
Ground problem
Step 9: Check for Open Circuits
With the appropriate circuits disconnected, check continuity between the sensor and control module.
An open circuit can result from:
-
Broken wire
-
Loose terminal
-
Corrosion
-
Failed splice
-
Damaged connector
Step 10: Check for Shorts to Ground
Test the signal and reference circuits for unintended continuity to ground.
A signal wire shorted to ground can produce a very low or invalid sensor signal.
Step 11: Check for Shorts to Voltage
Check the sensor circuits for unwanted battery voltage or another circuit's voltage.
A short to voltage may cause high-signal conditions or damage the sensor.
Step 12: Perform a Wiggle Test
Monitor the pressure-sensor signal while carefully moving the wiring harness and connector.
If the signal changes unexpectedly, inspect the affected wiring or terminal.
Step 13: Check Live Pressure Data
Monitor the injection-air pressure PID with a scan tool.
Determine whether:
-
A pressure value is available
-
The reading changes
-
The value responds to system operation
-
The reading is plausible
P2037 is primarily a circuit code, but live data can help identify whether the sensor is communicating with the control module.
Step 14: Check the Reductant Air Pump
If the electrical circuit is functioning correctly, verify that the air pump operates as commanded.
Check:
-
Power
-
Ground
-
Command signal
-
Pump operation
-
Pressure output
Step 15: Check Actual Injection-Air Pressure
If the system architecture permits, use the manufacturer's approved pressure-testing procedure.
This can determine whether an apparently abnormal sensor reading corresponds to genuinely abnormal air pressure.
Step 16: Inspect Air Lines
Check the injection-air lines for:
-
Leaks
-
Cracks
-
Kinks
-
Blockages
-
Loose fittings
-
Contamination
-
Frozen moisture
Although these problems are more commonly associated with pressure-performance faults, they can help explain abnormal sensor readings.
Step 17: Check for DEF/AdBlue Crystallization
Inspect the reductant injector and nearby components for dried DEF/AdBlue deposits.
Crystallization can interfere with the dosing system and should be addressed according to manufacturer instructions.
Step 18: Check Manufacturer Technical Information
Look for:
-
Technical Service Bulletins
-
Known pressure-sensor failures
-
Wiring problems
-
Connector updates
-
Air-pump failures
-
Software updates
-
SCR system service procedures
Step 19: Check the Aftertreatment Control Module
If the sensor, power/reference circuit, ground, signal circuit, wiring, and connectors all test correctly, investigate the relevant control module.
Module replacement should be considered only after the external circuit has been verified.
How to Fix P2037
The correct repair depends on the failed part of the pressure-sensor circuit.
Replace the Faulty Pressure Sensor
If testing confirms an internal pressure-sensor failure, replace the sensor.
The sensor should not be replaced automatically simply because P2037 is stored.
Repair an Open Circuit
Repair or replace broken wiring, damaged splices, or loose terminals.
Repair a Short Circuit
Locate the short and repair the damaged insulation or wiring.
Determine whether the circuit is shorted to:
-
Ground
-
Battery voltage
-
Another circuit
Repair Damaged Wiring
Replace or repair wiring damaged by:
-
Heat
-
Abrasion
-
Vibration
-
Water
-
Road debris
Ensure the repaired harness is correctly routed and secured.
Repair or Replace the Connector
Replace or repair connectors with:
-
Corroded terminals
-
Loose pins
-
Damaged seals
-
Poor terminal tension
-
Broken locking mechanisms
Repair the Reference-Voltage Circuit
If the sensor does not receive the required reference voltage, repair the circuit supplying it.
Repair the Sensor Ground
Repair any corroded, broken, or high-resistance ground connection.
Repair the Sensor Signal Circuit
If the signal wire is open, shorted, or damaged, repair the circuit.
Repair a Fuse or Power-Supply Problem
If a fuse or shared power supply is faulty, repair the underlying problem and replace the fuse with the correct specification.
Repair the Reductant Air System if Required
If testing reveals an actual pressure problem, inspect and repair:
-
Reductant air pump
-
Pressure regulator
-
Pressure-control valve
-
Air lines
-
Air fittings
-
Reductant injector
The air system should be repaired only when testing confirms a pressure-related problem.
Clean DEF/AdBlue Crystallization
If crystallized reductant is interfering with the dosing system, clean or replace the affected component according to manufacturer procedures.
Update Control Module Software
If a manufacturer software update addresses the fault, reprogram the applicable control module.
Replace the Aftertreatment Control Module
If the module has a confirmed internal sensor-circuit fault after all external components and wiring have been tested, module replacement may be necessary.
Perform Required Calibration or Initialization
After replacing a pressure sensor or another SCR component, the vehicle may require:
-
Pressure-sensor calibration
-
Reductant-system initialization
-
SCR reset
-
Air-pressure system test
-
Dosing-system test
-
Aftertreatment self-test
-
Module programming
The exact procedure varies by vehicle.
Clear the Code and Verify the Repair
After completing the repair:
-
Clear P2037.
-
Start the engine.
-
Check sensor power/reference voltage.
-
Verify sensor ground.
-
Monitor sensor signal.
-
Activate the reductant air system where applicable.
-
Monitor injection-air pressure.
-
Verify sensor response.
-
Check reductant dosing operation.
-
Test-drive the vehicle.
-
Rescan for stored and pending codes.
The repair should be considered successful only when the pressure sensor communicates correctly with the control module and P2037 does not return.
What Happens If P2037 Is Ignored?
If the pressure-sensor circuit remains faulty, the SCR system may not be able to accurately monitor injection-air pressure.
Possible consequences include:
-
DEF/AdBlue warning
-
SCR system warning
-
Incorrect reductant dosing
-
Reduced reductant injection
-
Dosing interruption
-
Poor reductant atomization
-
Increased NOx emissions
-
Reduced SCR efficiency
-
Additional aftertreatment codes
-
Reduced engine power
-
Speed limitations
-
DEF/AdBlue countdown
-
Restart restrictions on some vehicles
The exact consequences depend on the vehicle's emissions-control strategy.
Can You Drive With P2037?
Short-term driving may be possible if the vehicle operates normally, but P2037 should be diagnosed promptly.
The vehicle may initially have only a Check Engine Light or emissions warning.
However, a persistent SCR fault can eventually lead to:
-
DEF/AdBlue countdown
-
Reduced engine power
-
Speed limitation
-
Emissions-system warnings
-
Restart restrictions
If the vehicle displays a countdown or reduced-power warning, the SCR system should be inspected as soon as possible.
Is P2037 a Serious Code?
P2037 is generally considered a moderate-severity emissions-system fault.
It does not normally indicate immediate mechanical engine failure.
However, the vehicle's SCR system may be unable to properly monitor reductant injection-air pressure when the sensor circuit is malfunctioning.
The situation becomes more serious if P2037 is accompanied by:
-
Reductant air-pump faults
-
Pressure-control faults
-
Reductant injector faults
-
NOx sensor faults
-
SCR efficiency faults
-
DEF/AdBlue countdown
-
Reduced-power warnings
The fault should therefore be diagnosed before the vehicle enters an emissions-related operating restriction.
P2037 vs. P2038, P2039, P2040 and P2041
These codes are closely related but describe different pressure-sensor conditions.
| Code | General Meaning |
|---|---|
| P2037 | Reductant Injection Air Pressure Sensor "A" Circuit Malfunction |
| P2038 | Reductant Injection Air Pressure Sensor "A" Circuit Range / Performance |
| P2039 | Reductant Injection Air Pressure Sensor "A" Circuit Low |
| P2040 | Reductant Injection Air Pressure Sensor "A" Circuit High |
| P2041 | Reductant Injection Air Pressure Sensor "A" Circuit Intermittent |
The easiest way to distinguish them is:
P2037 → General circuit malfunction
P2038 → Signal range/performance problem
P2039 → Signal too low
P2040 → Signal too high
P2041 → Intermittent signal
This makes P2037 the broader electrical-circuit fault in this group.
P2037 vs. P2042–P2046
P2037 should not be confused with the reductant temperature sensor codes.
| Code | General Meaning |
|---|---|
| P2037 | Reductant Injection Air Pressure Sensor "A" Circuit Malfunction |
| P2042 | Reductant Temperature Sensor Circuit Malfunction |
| P2043 | Reductant Temperature Sensor Circuit Range / Performance |
| P2044 | Reductant Temperature Sensor Circuit Low |
| P2045 | Reductant Temperature Sensor Circuit High |
| P2046 | Reductant Temperature Sensor Circuit Intermittent |
Therefore:
P2037 → Injection air pressure sensor "A" circuit
P2042–P2046 → Reductant temperature sensor
P2037 does not automatically indicate a problem with the DEF/AdBlue temperature sensor.
P2037 vs. P2047–P2049
These codes concern different components within the reductant system.
| Code | General Meaning |
|---|---|
| P2037 | Reductant Injection Air Pressure Sensor "A" Circuit Malfunction |
| P2047 | Reductant Injection Valve Circuit/Open Bank 1 Unit 1 |
| P2048 | Reductant Injection Valve Circuit Low Bank 1 Unit 1 |
| P2049 | Reductant Injection Valve Circuit High Bank 1 Unit 1 |
Therefore:
P2037 → Pressure sensor circuit malfunction
P2047 → Injection valve circuit open
P2048 → Injection valve circuit low
P2049 → Injection valve circuit high
P2037 does not automatically mean that the reductant injection valve is defective.
How to Prevent P2037
Not every electrical or sensor failure can be prevented, but proper maintenance can reduce the likelihood of SCR circuit problems.
Recommended practices include:
-
Inspect SCR wiring during routine servicing.
-
Protect wiring from exhaust heat.
-
Prevent harnesses from rubbing against chassis components.
-
Inspect pressure sensor connectors for corrosion and moisture.
-
Repair damaged wiring promptly.
-
Inspect air-pump electrical connections.
-
Repair damaged air hoses.
-
Address DEF/AdBlue crystallization when discovered.
-
Use the correct DEF/AdBlue specification.
-
Avoid unnecessary modifications to SCR wiring.
-
Address emissions-system warnings promptly.
-
Inspect SCR wiring after exhaust or underbody repairs.
-
Pay attention to recurring faults that occur only when the vehicle is hot, cold, wet, or under vibration.
Final Thoughts
P2037 Reductant Injection Air Pressure Sensor "A" Circuit Malfunction indicates that the vehicle's control module has detected a general electrical problem in the circuit associated with the reductant injection air pressure sensor "A".
Unlike P2039 or P2040, which specifically identify a low or high signal, P2037 is a broader circuit malfunction code.
Possible causes include:
-
Faulty pressure sensor
-
Open circuit
-
Short circuit
-
Damaged wiring
-
Corroded connector
-
Loose terminals
-
Missing reference voltage
-
Sensor ground problem
-
Signal-circuit fault
-
Power-supply problem
-
Water intrusion
-
DEF/AdBlue contamination
-
Aftertreatment control-module fault
-
Software or calibration problems
The most important diagnostic approach is to test the circuit rather than immediately replacing the pressure sensor.
The technician should verify the sensor's power or reference voltage, ground, signal circuit, wiring continuity, connector condition, and possible shorts.
If the electrical circuit is correct, the pressure sensor itself should then be evaluated. If the sensor is functioning correctly, attention can shift to the actual injection-air system and the control module.
Once the underlying problem is identified, the repair may involve wiring or connector repair, pressure-sensor replacement, power or ground repair, or, if testing confirms an actual pressure problem, repair of the reductant air pump, pressure regulator, control valve, air lines, or injector.
After the repair, the code should be cleared and the vehicle tested under the conditions that caused the fault.
A successful repair should restore reliable communication between the pressure sensor and the control module and prevent P2037 from returning.
Because an unresolved SCR fault can eventually result in incorrect reductant dosing, increased NOx emissions, reduced SCR efficiency, DEF/AdBlue warnings, reduced engine power, or emissions-related operating restrictions, the problem should be properly diagnosed rather than simply cleared from memory.