TR
TR EN
EN

Diagnosing Headlight Problems and Common Headlight Failures
Headlights are one of the most important safety systems on a vehicle. They allow you to see the road at night, make your vehicle visible to other drivers, and provide essential illumination in poor weather and low-visibility conditions.
A headlight problem is not always as simple as a burned-out bulb. Depending on the symptoms, the cause could be a bulb, connector, fuse, relay, wiring problem, ground connection, switch, control module, ballast, HID igniter, alternator, or even moisture inside the headlight housing.
The good news is that many headlight problems can be narrowed down by observing exactly what the lights are doing.
One Headlight Is Not Working
If only one headlight is not working while the other side operates normally, the bulb is usually the first component to check.
Halogen and other filament-type bulbs eventually fail because the filament wears out and breaks. Their service life varies considerably depending on bulb type, operating hours, vibration, voltage, and driving conditions.
Frequent nighttime driving and rough roads can shorten bulb life because the filament is exposed to more operating hours and vibration.
However, never assume that a non-working headlight automatically means the bulb is burned out.
The connector, socket, wiring, fuse, ground connection, or headlight control system can also be responsible.
Check the Connector Before Replacing the Bulb
Before installing a new bulb, inspect the electrical connector at the rear of the headlight.
Look for:
-
Loose connections
-
Corrosion
-
Burned or melted plastic
-
Damaged terminals
-
Broken wires
-
Signs of water intrusion
-
A connector that does not lock securely
A damaged connector can prevent a new bulb from working and may cause the replacement bulb to fail again.
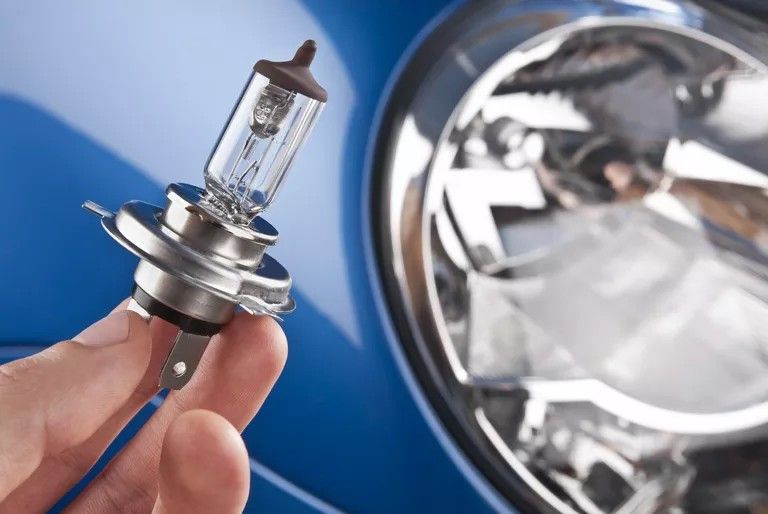
Replacing a Halogen Headlight Bulb
On many vehicles, the bulb can be replaced from the rear of the headlight housing. Access varies significantly between models.
Some vehicles provide plenty of space behind the headlight, while others require removal of an airbox, battery, wheel-well liner, grille, or even part of the front bumper.
Always check the vehicle owner's manual for the correct bulb type and replacement procedure.
Before replacing the bulb:
-
Switch off the engine.
-
Turn the headlights off.
-
Allow the bulb to cool.
-
Disconnect the electrical connector.
-
Release the retaining clip or locking mechanism.
-
Remove the old bulb.
-
Install the new bulb in the correct orientation.
-
Reconnect the electrical connector.
-
Test the headlight.
Never Touch the Glass of a Halogen Bulb
When installing a halogen bulb, avoid touching the glass envelope with your bare fingers.
Oil and contamination from your skin can remain on the glass and create localized hot spots when the bulb reaches operating temperature. This can shorten bulb life or damage the bulb.
Hold the bulb by its base or use clean gloves or a clean cloth as appropriate.
Test the Bulb Before Final Assembly
After connecting the replacement bulb, test the headlight before completely reassembling everything.
If the new bulb works, switch the headlights off and finish securing the bulb and connector.
Make sure the bulb and rear cover are correctly sealed. A poorly installed cover can allow water and dirt to enter the housing.
Moisture inside the headlight can eventually cause corrosion, electrical problems, lens damage, and persistent fogging.
If the new bulb does not work, the problem is probably somewhere else in the circuit.
The next things to investigate are the socket, connector, wiring, fuse, ground, and headlight control system.
If a socket is corroded, an appropriate electrical contact cleaner may help with light surface contamination. A badly burned, loose, or damaged socket should be replaced rather than simply cleaned.
Xenon HID Headlight Is Not Working
Xenon High-Intensity Discharge (HID) headlights work differently from conventional halogen bulbs.
An HID bulb does not use a traditional filament. Instead, an electrical arc is produced inside the bulb, requiring a high-voltage ignition system and appropriate control electronics.
Depending on the vehicle, the HID bulb and igniter may be separate components or may be integrated into one assembly.
Possible causes of an HID headlight failure include:
-
Failed HID bulb
-
Loose or damaged connector
-
Corroded bulb socket
-
Failed igniter
-
Failed ballast/control unit
-
Poor ground connection
-
Damaged wiring
-
Water intrusion
-
A control-module fault
HID systems can involve high voltage, so they should be treated with considerably more caution than a conventional 12-volt halogen circuit.
Do not disconnect or handle high-voltage HID components while the system is energized.
How to Narrow Down an HID Problem
The basic diagnostic principle is to determine whether the problem follows the bulb or remains with the vehicle-side circuit.
Where the vehicle design and service procedure allow it, a known-good bulb can be used for testing.
If the known-good bulb works on the problematic side, the original bulb is likely faulty.
If the known-good bulb also fails, the problem may be related to the igniter, ballast, wiring, ground, connector, or control system.
Some vehicles have separate igniters and ballasts, while others combine these functions. Therefore, blindly replacing the most expensive component is not a good diagnostic strategy.
Do not interchange HID components unless the manufacturer allows this procedure and the components are compatible.
Incorrect testing can damage components or create a dangerous high-voltage condition.
Both Headlights Are Not Working
If both headlights suddenly stop working, the problem is less likely to be two bulbs failing simultaneously.
The first things to investigate are components shared by both headlights.
Possible causes include:
-
Blown fuse
-
Faulty headlight relay
-
Headlight switch failure
-
Combination switch or stalk failure
-
Body control module or lighting control module fault
-
Wiring problem
-
Poor ground
-
Power supply problem
-
CAN-bus or communication problem on some modern vehicles
Start by checking the relevant headlight fuses.
The fuse location can normally be found in the owner's manual or fuse-box diagram.
If a fuse is blown, replace it only with another fuse of the same specified rating.
Never install a higher-rated fuse to prevent it from blowing.
If the New Fuse Blows Immediately
A fuse that blows immediately after replacement is an important diagnostic clue.
It can indicate a short circuit, damaged wiring, a failed component, or another excessive-current condition in the circuit.
Do not keep replacing fuses.
Repeatedly installing new fuses without finding the cause can damage wiring and electrical components and can create a fire risk.
At this point, the circuit should be tested using a wiring diagram and appropriate electrical diagnostic equipment.
Testing Headlight Power
A digital multimeter or suitable 12-volt test light can be used to determine whether power is reaching the appropriate part of the headlight circuit.
However, simply finding voltage does not always prove that the circuit is healthy.
A circuit can show voltage with no load but fail when current is actually drawn because of:
-
High resistance
-
Corroded terminals
-
Damaged wiring
-
Poor ground connections
-
Loose connectors
For this reason, proper electrical diagnosis may require voltage-drop testing rather than simply measuring voltage at an unloaded connector.
Check the Headlight Relay
If the vehicle uses a conventional headlight relay, the relay can be tested according to the manufacturer's procedure.
Older relay designs may sometimes produce a noticeable rattle if physically shaken because internal components have broken. However, shaking a relay is not a reliable diagnostic test by itself.
The proper approach is to test the relay's power supply, control signal, and switched output.
Modern vehicles may not use a traditional replaceable headlight relay at all. Lighting functions can instead be controlled electronically by a body control module or dedicated lighting module.
Headlight Switch or Combination Switch Failure
Headlight switches and combination switches can wear out over many years of use.
If the headlights do not respond correctly when the switch or stalk is operated, the switch itself may be faulty.
For example, if:
-
Low beams work but high beams do not
-
High beams work but low beams do not
-
Flash-to-pass does not work
-
Headlights operate intermittently
-
The lighting function changes when the stalk is moved
the combination switch, its wiring, or the vehicle's lighting control system should be investigated.
Replacing a steering-column combination switch can be more complicated than replacing a conventional headlight bulb, and some modern vehicles may require additional procedures after replacement.
Headlights Flicker or Their Brightness Fluctuates
Headlights that repeatedly flicker, pulse, or change brightness can indicate an electrical or charging-system problem.
Possible causes include:
-
Alternator problems
-
Voltage regulator failure
-
Loose battery terminals
-
Poor ground connections
-
Damaged wiring
-
Battery problems
-
A failing lighting control module
-
LED driver problems
-
Poor-quality aftermarket lighting equipment
With the engine running, charging voltage should be checked according to the vehicle manufacturer's specifications.
A typical conventional charging system may produce a voltage in the approximate 13.5–14.5 volt range under certain conditions, but this is not a universal specification. Modern vehicles can deliberately vary charging voltage depending on battery state, temperature, electrical load, and energy-management strategy.
Therefore, a reading below or above a generic range does not automatically prove that the alternator is defective.
If the headlights fluctuate together with other electrical symptoms, such as dashboard flickering, warning lights, difficult starting, or battery warnings, the charging system deserves particular attention.
Headlights Are Not Bright Enough
Sometimes the headlights work perfectly but do not illuminate the road properly.
There are several possible explanations.
The problem may be caused by:
-
Dirty headlight lenses
-
Clouded or oxidized plastic lenses
-
Internal condensation
-
Water intrusion
-
Incorrect bulb installation
-
Weak or deteriorated bulbs
-
Poor-quality aftermarket bulbs
-
Incorrect headlight aim
-
Electrical voltage problems
-
Damaged reflectors or projector components
Before replacing the entire headlight assembly, inspect the outside of the lens.
Cloudy or Yellowed Headlight Lenses
Older vehicles often develop yellow, hazy, or cloudy plastic headlight lenses.
Ultraviolet radiation, weather exposure, chemicals, oxidation, and age can degrade the outer plastic surface.
A severely oxidized lens can scatter light instead of allowing the optical system to produce a clean beam.
Professional headlight restoration can sometimes significantly improve the output without replacing the entire headlight assembly.
However, restoration is not a cure for every headlight problem.
If the internal reflector, projector, mounting system, or optical components are damaged, replacement may still be necessary.
Moisture and Condensation Inside the Headlight
Light condensation inside a headlight does not always mean that the headlight housing is permanently leaking.
Modern headlights normally require ventilation because the air inside the housing expands and contracts with temperature changes.
Small amounts of temporary condensation can sometimes disappear after the headlight operates and the housing warms up.
Persistent moisture, water droplets, pooling water, or condensation that repeatedly returns should be investigated.
Possible causes include:
-
Damaged housing
-
Cracked lens
-
Missing or damaged rear cover
-
Damaged seals
-
Blocked ventilation
-
Poorly installed aftermarket components
-
Water entering through a connector or opening
Water inside the housing can damage bulbs, LED modules, ballasts, connectors, and control electronics.
Do Not Drill Holes in Modern Headlights
Older repair advice sometimes recommends drilling a small hole in the headlight housing to allow moisture to escape.
This is generally not a recommended repair for modern headlights.
Drilling the housing can compromise its sealing and allow dust, water, and contaminants to enter more easily. Modern headlights are designed with ventilation systems that should be kept intact.
Instead, determine why excessive moisture is entering the housing and repair the underlying sealing or ventilation problem.
If a headlight contains significant water, the housing may need to be removed, dried, repaired, or replaced depending on its construction.
Incorrect Headlight Aim Can Reduce Visibility
A perfectly functioning headlight can still provide poor visibility if it is incorrectly aimed.
If the beam is too high, it can dazzle approaching drivers. If it is too low, the road ahead may not be illuminated far enough.
A beam that is horizontally misaligned can also produce poor road coverage.
Headlight aim should ideally be checked and adjusted using the manufacturer's specified procedure and equipment.
A basic wall check can provide a useful indication of an obvious aiming problem, but it should not be considered a substitute for professional headlight aiming equipment.
The correct beam pattern varies according to the headlight design, vehicle height, load, and applicable regulations.
Aftermarket Xenon and LED Conversions Can Create Problems
Installing aftermarket HID or LED conversion kits into a headlight housing designed for a different light source can create several problems.
The issue is not simply whether the replacement bulb produces more light.
The optical system is designed around a particular light source position and geometry. An incompatible bulb can create an incorrect beam pattern, excessive glare, poor road illumination, or electrical problems.
It can also cause condensation or sealing problems if the original rear cover is modified.
For vehicles equipped with projector, HID, or LED systems, the correct replacement component should be selected for the specific headlight assembly.
Check the Whole Circuit Before Buying an Expensive Headlight
A complete headlight assembly can be very expensive, particularly on modern vehicles equipped with LED modules, adaptive lighting, projectors, electronic control units, or integrated daytime running lights.
Therefore, do not immediately replace the complete headlight because one lighting function has stopped working.
A proper diagnosis should determine whether the actual problem is:
-
Bulb
-
Fuse
-
Relay
-
Connector
-
Wiring
-
Ground
-
Switch
-
Ballast
-
Igniter
-
LED driver
-
Lighting control module
-
Headlight assembly
Replacing an expensive assembly without confirming the cause can turn a relatively inexpensive electrical repair into an unnecessary major expense.
Headlight Problems That Require Professional Diagnosis
Some headlight repairs are relatively simple, while others should be left to a qualified technician.
Professional diagnosis is recommended when the problem involves:
-
HID high-voltage components
-
Adaptive headlights
-
Matrix LED systems
-
Headlight control modules
-
CAN-bus communication faults
-
Intermittent electrical failures
-
Damaged wiring
-
Water-damaged electronic components
-
Automatic leveling systems
-
Complex projector or LED assemblies
Modern headlights can contain multiple electronic modules and sensors, so a diagnostic scan may be necessary in addition to traditional electrical testing.
Headlight Recalls Can Also Cause Lighting Problems
Headlight failures have resulted in vehicle recalls over the years.
For example, some manufacturers have recalled vehicles because of headlight driver-module failures, overheating, wiring defects, loose bulb connections, or other lighting-system problems.
A recall is especially important because the manufacturer may repair the problem free of charge.
If you experience a recurring headlight problem, check the vehicle's official recall information using its VIN rather than assuming that the failure is simply caused by an old bulb.
A Headlight Problem Is More Than an Inconvenience
Headlights are directly connected to road safety.
A failed bulb can reduce your ability to see at night, while an incorrectly aimed headlight can reduce visibility and potentially blind other road users.
Electrical problems can also become more serious if damaged wiring, overheating connectors, water intrusion, or short circuits are left unresolved.
The best approach is therefore to diagnose the symptom rather than replace parts at random.
If one bulb fails, start with the bulb and connector. If both headlights fail, investigate the shared power and control components. If the lights flicker, examine the charging and electrical system. If the beam is weak, inspect the lens, bulb, optical system, and headlight aim. If moisture repeatedly appears inside the housing, find the source of the water intrusion rather than simply trying to dry the headlight.
A systematic diagnosis can save money, prevent unnecessary parts replacement, and—most importantly—make sure your headlights provide the visibility you need when driving after dark.